What Is Mixamo?
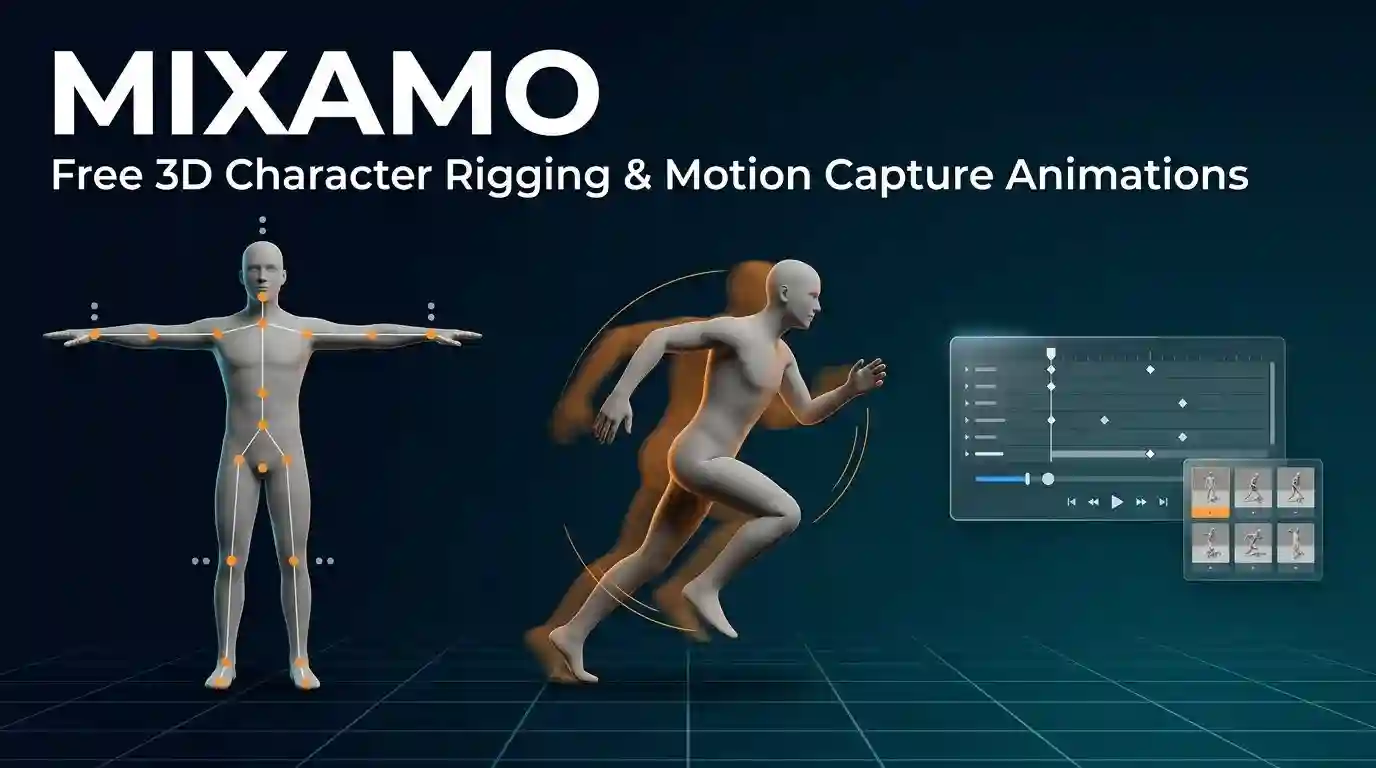
Mixamo is a free, browser-based animation service from Adobe that builds a skeleton for your 3D character and applies thousands of motion capture clips to it. You upload a humanoid model, drop five markers on the chin, wrists, elbows, knees, and groin, and the Auto-Rigger returns a working rig in about a minute. Then you pick a walk, a punch, or a dance, tune it with sliders, and download an FBX for Unity, Unreal Engine, Blender, Maya, or Cinema 4D.
That is the whole product: rigging plus a mocap library, running in Chrome or Edge, with nothing to install.
The service started in 2008 as a spin-off of Stanford University’s Biomotion Lab, founded by Stefano Corazza and Nazim Kareemi. Adobe acquired the company on 1 June 2015 and has run it free ever since. The Auto-Rigger was the first online rigging tool of its kind, and it still uses machine learning to find limbs and solve skin weights.
The tool covers four jobs:
- Auto-rigging — a full human skeleton, custom fit to your mesh, with skinning weights
- Motion library — clips performed by professional actors and cleaned by keyframe animators
- Preview and tuning — arm height, posture, speed, and in-place controls on every clip
- Export — FBX files sized for games, film, VR, and motion graphics
Adobe also links the site to Substance 3D, Adobe Aero, and Dimension, so a rigged character can walk straight into a branding scene or an AR experience.
Who Should Use Mixamo?
This tool rewards people who need motion today and cannot rent a mocap stage.
- Indie game developers shipping a playable build this month
- Students and self-taught artists learning how rigs and animation states work
- VR and AR teams filling scenes with believable body language
- YouTubers and illustrators who need one looping idle for a thumbnail or a short film
- Architectural visualizers adding walking people to a flythrough
- Studios on a deadline blocking out a level before the animator joins
Skip the service if your character is a quadruped, a spider, a dragon, or anything with extra limbs. Adobe’s own FAQ states the auto-rigger and animation library support bipedal humanoids only. Custom rigs lose value here too, because the rigger ignores any bones already inside your file.
How Much Does It Cost, and Can You Sell Your Work?
Nothing. The platform is free for anyone with an Adobe ID, and it does not require a Creative Cloud subscription. There is no paid tier, no credit pack, and no watermark.
The licence matters more than the price. Adobe’s FAQ confirms that both characters and animations are royalty free for personal, commercial, and non-profit projects. In plain terms, you can:
- Ship characters inside a paid video game
- Use them in client films, ads, and illustrations
- 3D print the models
- Publish them in non-profit and educational work
- Bundle them in a paid asset pack you created yourself, as part of your own scene
Two restrictions apply. The service is not available to Enterprise and Federated IDs, and it is not available to accounts carrying a country code from China.
One habit will protect you: Adobe keeps only the last character you used, with no history of older uploads. Download every rigged character and clip you like, and store it in your project folder. Treat the site as a workshop, not a storage locker.
Getting Started: Your First Rigged Character in 10 Minutes
Create a free Adobe ID at adobe.com, then sign in at mixamo.com. The page loads a character on a turntable with the library down the right side.
Follow this order:
- Click Upload Character and select an FBX, OBJ, or ZIP file. A ZIP must contain the model, its MTL, and its textures.
- Confirm scale and pose in the viewer. Adobe recommends the character sit at the world origin (0,0,0) so unit differences never offset your animation.
- Place the five markers: chin, both wrists, both elbows, both knees, and groin. Drag each dot onto the joint itself, not the surface near it.
- Press Next and wait while the solver builds the skeleton and paints the skin weights.
- Name the rig, then download it once so you always own a rigged copy of your own model.
The finished skeleton carries the mixamorig: prefix on every bone, starting at mixamorig:Hips. Finger and toe bones come along when your mesh supports them. You can also tick the optimisation options for mobile performance before export.
A quick note on spelling. People type maximo when they mean this animation site, and that query usually returns IBM Maximo, the enterprise asset management platform. Nothing about 3D.
Some users also type mixoko or mixmo and land on unrelated software pages. This page covers the animation tool.
How the Auto-Rigger Works (and Why Uploads Fail)
The Auto-Rigger reads your mesh, guesses where the limbs sit, inserts a skeleton, and solves skinning weights. The pass takes seconds, but it only behaves on clean input.
Adobe’s documentation lists the conditions that decide success:
- The character reads as humanoid, with a clear head, body, arms, and legs
- No large extra appendages: no wings, tails, extra limbs, or oversized hair and clothing
- The model stands in a neutral pose; posed or heavily asymmetric meshes confuse the solver
- The file holds nothing else: no cameras, lights, empties, or helper objects
- No gaps between parts; a floating head or detached hands will fail
- The character sits centred at the origin
- The mesh is clean, with no holes, non-manifold edges, or flipped normals
Fix your file before you blame the service. Most failed uploads I have handled came from a GLB renamed to .fbx, a model left in a run pose, or a scene full of Blender empties. Run the mesh through your modelling app once, apply all transforms, delete the extras, and export again.
Prepare Your Character So the Rig Lands Clean
Ten minutes of prep beats an hour of fixing weights later. This is the checklist I run on every mesh:
- Retopo around joints. Add edge loops at the shoulders, elbows, hips, and knees so deformation bends instead of collapsing.
- Keep it one mesh. Separate clothing and hair often rig badly; merge what should move with the body, or accept stiff accessories.
- Freeze the T-pose or A-pose. Arms out to the side, palms down, feet flat, facing forward.
- Delete history and freeze transforms in Maya, or apply location, rotation, and scale in Blender.
- Check the poly budget. Mobile characters stay under 30,000 triangles; hero game characters sit between 40,000 and 90,000.
- Bake textures down to 2K before upload. The rigger does not care about 8K maps, and your browser upload will thank you.
- Mirror the mesh. Asymmetry pushes markers off-centre and creates crooked skin weights.
Run one throwaway rig before the real one. Upload a duplicate, check how the elbows bend, then fix the mesh and upload the final version.
Inside the Animation Library: Finding Motion Fast
The library holds thousands of full-body clips captured from professional motion actors, then polished by keyframe animators. Every clip retargets onto your own character, so the same punch works on a knight, a robot, or a cartoon kid.
Search by keyword and browse these groups:
- Idle and standing — breathing idles, looking around, hand on hip, weight shifts
- Locomotion — walks, runs, sprints, jumps, crouch moves, ladder climbs
- Combat — punches, kicks, blocks, sword swings, weapon draws, hit reactions
- Sports and fitness — swings, throws, stretches, martial arts forms
- Daily actions — sitting, picking objects up, carrying boxes, pointing, waving
- Dance and performance — club styles, breakdance, stage moves
- Death and defeat — falls, collapses, knockout loops
Three controls do most of the tuning work. In Place locks the root bone so your character animates on the spot instead of walking off screen. Arm Space and Posture reshape the gesture. Play Speed and the keyframe sliders retime the clip from roughly half speed to double.
Preview on your own mesh before you download. A clip that looks great on a slim character can clip badly through a bulky one, and you will only see it in the preview window.
Build a Starter Clip List for a Game
Pull these 22 clips and you can prototype most character controllers:
- Idle, walk, run, sprint, crouch idle, crouch walk
- Jump start, jump air, jump land
- Attack light, attack heavy, block, block hit
- Hit reaction front, hit reaction back, death
- Interact, carry, sit down, stand up
- Wave, point, clap (for cutscenes and menus)
Name each download by function, not by the library title. char_hero_run.fbx beats Running Forward 02.fbx when a level designer needs the file at midnight.
Export Settings That Keep Your Files Clean
The service exports FBX, which every major engine reads. Your settings decide how much cleanup you do later.
- Format — FBX Binary for Unity, Unreal, Blender, Maya, and Cinema 4D. FBX 7.4 stays compatible with older pipelines.
- Skin — choose With Skin the first time you export a character, then Without Skin for every animation after that. File sizes drop hard.
- Frames per Second — 30 fps for games, 24 fps for film work, 60 fps when you plan slow motion.
- Keyframe Reduction — leave the default unless a clip looks choppy in-engine, then turn it off and re-export that single clip.
Exporting without skin is the single biggest space saver. One rigged character at 4 MB plus 30 skinless clips under 400 KB each beats 30 copies of the same mesh.
Preview on your own mesh before you download. A clip that looks great on a slim character can clip badly through a bulky one, and you will only see it in the preview window.
Build a Starter Clip List for a Game
Pull these 22 clips and you can prototype most character controllers:
- Idle, walk, run, sprint, crouch idle, crouch walk
- Jump start, jump air, jump land
- Attack light, attack heavy, block, block hit
- Hit reaction front, hit reaction back, death
- Interact, carry, sit down, stand up
- Wave, point, clap (for cutscenes and menus)
Name each download by function, not by the library title. char_hero_run.fbx beats Running Forward 02.fbx when a level designer needs the file at midnight.
Export Settings That Keep Your Files Clean
The service exports FBX, which every major engine reads. Your settings decide how much cleanup you do later.
- Format — FBX Binary for Unity, Unreal, Blender, Maya, and Cinema 4D. FBX 7.4 stays compatible with older pipelines.
- Skin — choose With Skin the first time you export a character, then Without Skin for every animation after that. File sizes drop hard.
- Frames per Second — 30 fps for games, 24 fps for film work, 60 fps when you plan slow motion.
- Keyframe Reduction — leave the default unless a clip looks choppy in-engine, then turn it off and re-export that single clip.
Exporting without skin is the single biggest space saver. One rigged character at 4 MB plus 30 skinless clips under 400 KB each beats 30 copies of the same mesh.
Fixing the 10 Most Common Mixamo Problems
These are the failures I meet in almost every project, in the order people hit them.
- “Unable to map your existing skeleton.” There are already bones in your file. Strip them and re-export the raw mesh.
- Upload greyed out or rejected. A GLB is pretending to be an FBX. Open it in Blender, export a real FBX with embedded textures, and try again.
- Feet slide or the character drifts. Turn on In Place, then handle travel with a movement script or root motion.
- Fingers stay frozen. The rigger skipped them. Re-rig with the fingers option, or add finger curves by hand in your 3D app.
- Character explodes into a T-pose mess. The skin bind does not match the skeleton. Re-export the character With Skin and reimport it fresh.
- Animation plays on the wrong character. You copied clips across mismatched skeletons. Use a humanoid retarget system instead.
- Motion looks stiff in-game. Blend clips with a state machine or a blend space, and add a small amount of noise to idle poses.
- Old upload disappeared. Only your last character stays on the server. Keep local copies of everything.
- Hips rotate 90 degrees on import. Unit or axis mismatch between your modelling app and the engine. Check the FBX axis system and set scale to 1.
- Clips do not loop cleanly. Trim the keyframe range in the export panel so the first and last frames match, then tick Loop Time in-engine.
Mixamo in Unity, Unreal Engine, and Blender
Each engine wants a slightly different handoff.
Unity. Import the FBX, set Rig type to Humanoid, and click Configure to check the avatar mapping. Humanoid mode lets one animation drive every character in the project. Tick Loop Time on idle and locomotion clips, then build an Animator Controller with a blend tree driven by movement speed.
Unreal Engine 5. Import against the Mannequin skeleton for a quick test. For real work, build an IK Rig and an IK Retargeter, then run clips through a Control Rig to fix foot planting. Unreal’s own mocap and Control Rig tools go well beyond what the preset library offers, so treat these clips as a first pass.
Blender. Import FBX and expect leaf bones on the tips of fingers and toes. Delete them, apply scale, and rename the armature to match your own naming rules. Auto-Rig Pro remains the fastest add-on for rebuilding a rig after a first pass.
Maya and Cinema 4D both read the FBX cleanly. In Maya, check joint orientation before you layer new keys on top of imported motion.
Best Mixamo Alternatives Worth Knowing
The preset library covers the middle of the market well. When a project needs custom performance, facial capture, or non-human anatomy, these tools pick up the slack.
| Tool | Motion source | Facial animation | Non-human rigs | Cost |
|---|---|---|---|---|
| Mixamo | Preset mocap library | No | No | Free |
| AccuRIG (Reallusion) | Auto-rig plus mocap store | Yes, via Headshot | Limited | Free base |
| Cascadeur | Physics-assisted keyframes | No | Yes | Free tier |
| Rokoko | Webcam or mocap suit | Yes | Yes | Paid |
| Move.ai / DeepMotion | Video-based AI capture | Partial | Yes | Subscription |
| ActorCore | Preset mocap store | Yes | Yes | Paid packs |
| MetaHuman (Unreal) | Facial performance capture | Best in class | Humanoid | Free with Unreal |
Pick the preset library when speed matters. Pick video capture or keyframe tools when the move has to be yours alone.
Pros and Cons at a Glance
| What you get | What it costs | Where it falls short |
|---|---|---|
| Auto-rig for any humanoid mesh | Free with an Adobe ID | Bipedal humanoids only |
| Thousands of cleaned mocap clips | No subscription, no credits | No way to author a brand new move |
| Per-clip sliders: in place, arms, speed, posture | Royalty-free commercial licence | Facial animation not supported |
| FBX export for every major engine | Works in any modern browser | Only the last character is stored online |
| Marker-based rigging in under a minute | No install, no GPU needed | Extra limbs, wings, and tails break the rigger |
Read that middle column twice. A royalty-free commercial licence with no subscription is the biggest reason this tool has stayed relevant for more than a decade.
Animation Words You Will Meet, Explained
Plain definitions so the tutorials make sense on the first pass.
- Rig — the skeleton and controls that let a static mesh move
- Skinning weights — numbers that say how much each bone pulls each vertex
- Retargeting — moving animation from one skeleton to another
- Blend shape — a stored facial or body pose you blend between, used for lip sync
- Root motion — movement driven by the animation itself instead of by code
- Blend space — a 2D grid that mixes clips by speed or direction
- IK (inverse kinematics) — solving a limb by placing the hand or foot, then letting joints follow
- Leaf bones — extra tip bones added on export; harmless, but delete them in Blender
- FBX — Autodesk’s interchange format that carries mesh, skeleton, and animation together
- T-pose / A-pose — the neutral standing poses riggers expect before skinning
Where It Fits in a Modern 3D Pipeline
Here is the pipeline I use on paid work, and it still starts with the same free rig:
- Model or generate the character, then retopo to clean edge loops around every joint
- Auto-rig the mesh and download the rigged copy with skin
- Pull 15 to 30 clips that match your project’s verbs: idle, walk, run, attack, hit, death
- Export animations without skin to keep the project light
- Retarget in-engine, blend the clips, then hand-fix the hero animations
- Capture faces separately with MetaHuman or a webcam-based tool
- Add procedural detail — cloth, hair, weapon sway — after the body motion reads well
Steps 2 and 3 used to eat three weeks of an animator’s time. You now spend those hours on the ten animations players actually notice.
FAQ: Mixamo Questions Answered
Is Mixamo really free?
Yes. It is free for anyone with an Adobe ID, and it does not need a Creative Cloud subscription. Adobe’s FAQ confirms there are no extra purchases or paid tiers, and both characters and animations are royalty free for personal, commercial, and non-profit projects. Enterprise and Federated IDs cannot access it, and accounts with a China country code are blocked.
What is the difference between Mixamo and Maximo?
They share a spelling, nothing else. This tool is Adobe’s 3D character animation service. Maximo, properly IBM Maximo, is enterprise asset management software for tracking machines and maintenance schedules. Searches for “maximo animation” or “maximo 3d” almost always mean the Adobe service, and the same goes for misspellings such as mixoko.
Can I use these animations in a game I sell?
Yes. Adobe grants a royalty-free licence for commercial work, so shipped games, paid apps, client films, and merchandise are all covered. Keep a dated download record of every clip and character you use. That record settles any client question about asset provenance without a phone call.
Does it animate faces or animals?
No, to both. The auto-rigger and the motion library work on bipedal humanoids only, and the clips drive body motion, not blend shapes. For faces, use MetaHuman in Unreal, a webcam capture tool, or hand-keyed blend shapes. For creatures, rig by hand or use a package built for quadrupeds.
Why does my character slide or float in Unity?
Sliding usually means the clip travels in world space while your controller also moves the character. Export with In Place enabled, then drive movement from code or root motion, never both. Floating comes from a scale mismatch: check that your FBX import scale matches your project units, and confirm the character sat at the origin before rigging.
Do my characters stay saved on the site?
No. Adobe stores only the last character you used, and replacing it erases the history of earlier uploads. Download every rigged character and every animation you want to keep, and store them inside your project folder. This one habit has saved more deadlines than any other tip on this page.
Start Your First Rig Today
The tool costs nothing, so the only thing standing between you and a moving character is ten minutes of clicking.
- Create a free Adobe ID and sign in at mixamo.com
- Upload one humanoid mesh and place your five markers with care
- Download the rigged character with skin, and keep that copy safe
- Grab the 22 core clips from the starter list above
- Import into your engine, set up humanoid retargeting, and blend